Energy Node
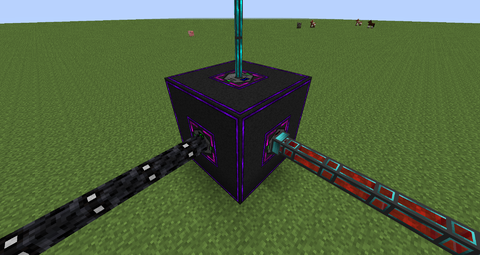
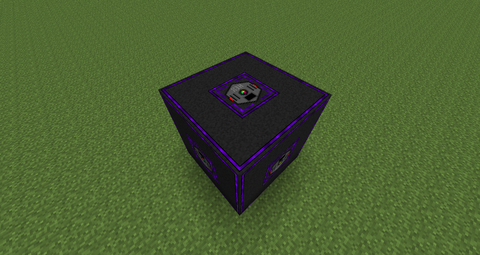
Energy Node is a multiblock structure from HEXCraft designed to convert different energy types and segment the HEX Energy Network.
Contents
How It Works
The Energy Node can convert different types of energy by linking up Energy Node Ports, which are part of the structure. The energy conversion is done internally using energy buffers in every port and then passing the energy between ports.
The node is tiered, both in the sense of how much energy per tick the ports can transfer, and how much loss there is in the energy conversion. The transfer tiers depend on the Energy Node Core used. Table below shows which tier allows for how much energy to transfer per tick. Keep in mind that the EU port and LU port will only be visible if you have IndustrialCraft 2 and GregTech-6 installed respectively. It is also important to note that HEX port's transfer rates aren't fixed and are only used if a HEX port is linked with another HEX port. All of these values can be changed in the config. Below is a table showing different tiers and different details about them.
| Port Type | Tier 1 | Tier 2 | Tier 3 | Tier 4 |
|---|---|---|---|---|
| Energy Node Port HEX | 64 HEX/t | 256 HEX/t | 1024 HEX/t | 4096 HEX/t |
| Energy Node Port RF | 200 RF/t | 800 RF/t | 8000 RF/t | 32000 RF/t |
| Energy Node Port EU | 32 EU/t | 128 EU/t | 512 EU/t | 2048 EU/t |
| Energy Node Port LU | 32 LU/t | 128 LU/t | 512 LU/t | 2048 LU/t |
The efficiency tiers depend on the Conversion Computer used. Energy Nodes without any Conversion Computer will run at 50% efficiency. Nodes with a Basic Conversion Computer run at 75%, and with an Advanced Conversion Computer run at full 100% efficiency. You may install multiple computers in a single node, but only the one with strongest value will be used.
| Efficiency | |
|---|---|
| No Conversion Computer | 50% |
| Basic Conversion Computer | 75% |
| Advanced Conversion Computer | 100% |
In addition to the info above, it is important to know that all ports have an Input (red arrow) and Output (green arrow) mode. Input ports will consume energy and output ports will emit energy. HEX ports have additional two modes: Interface (yellow sign) and Tunnel (blue sign). Interface mode allows you to connect two separate Energy Nodes together and use them to transfer energy from one point to another. Tunnel mode allows you to isolate a HEX Energy Network from another network, yet still route it through that same network. An example of this will be shown later.
Below are the conversion rates between different energy types. Again, these can all be adjusted in the config.
| To -> | HEX | RF | EU | LU |
|---|---|---|---|---|
| HEX | 1 | 0.3125 | 0.078125 | 0.078125 |
| RF | 3.2 | 1 | 0.25 | 0.25 |
| EU | 12.8 | 4 | 1 | 1 |
| LU | 12.8 | 4 | 1 | 1 |
Forming The Structure
The energy node is constructed out of specific blocks with certain rules. The structure is always 3x3x3 in size and can house up to 6 Energy Node Ports, one on each face. Below is a list of required blocks to construct an Energy Node.
- 1 Energy Node Core of any tier.
- 6-1 Energy Node Port of any type.
- 20-25 Hexorium Structure Casing blocks of any color, provided they are all of same color.
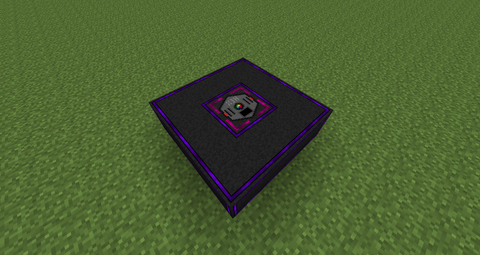
Start the construction by making the first layer look like shown on the screenshot. The color of Hexorium Structure Casings used here was purple, but you can use any color, provided all are the same. The Energy Node Port can be of any type and you may replace it with a casing if you wish to do so.
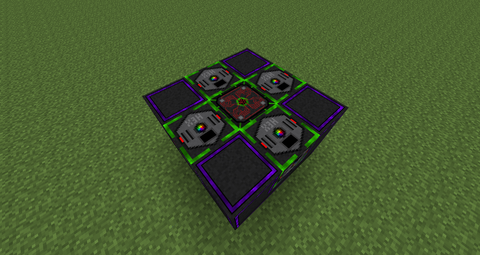
The second layer is where the Energy Node Core comes into play. The core dictates the tiers and transfer rates of all Energy Node Ports, so use the one that fits your needs. This layer can also have up to four Energy Node Ports, but similar to the previous layer, they are not required.
The final layer is identical to the first layer and can again house just one Energy Node Port.
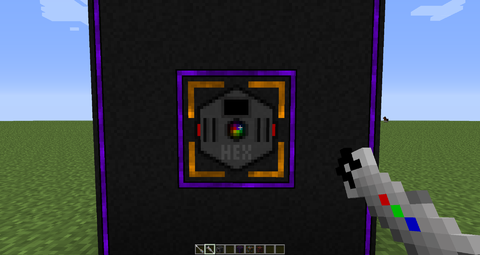
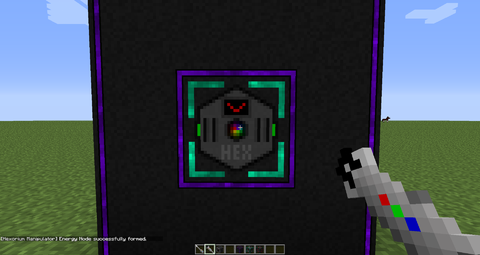
Once all layers have been placed, the node can be formed. To form the node, simply use the Hexorium Manipulator on any of the Energy Node Ports. To signify that it has been formed, the ports will change their texture to green glowing lines on side, instead of red ones and a chat message will be shown.
After the node has been formed, be sure to adjust different port modes by sneak-right clicking on them using the Hexorium Manipulator and then link them up using the manipulator normally. Ports can only be linked in pair, a port cannot be linked to two ports.
Examples
The examples below will cover most common usage cases and demonstrate all the things that can be done with the Energy Node. Keep in mind that a lot more things are possible and you are limited only by your imagination.
Simple Energy Conversion
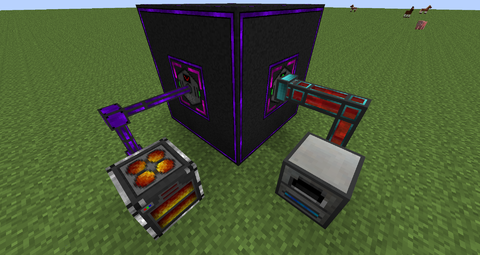
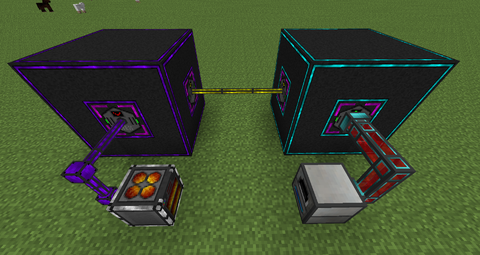
This example shows a very simple energy conversion from HEX to RF. A Hexorium Generator is producing HEX energy which is then input to an Energy Node Port HEX set to Input mode. This port was previously linked with the Energy Node Port RF set to Output mode. As such, the energy will be converted to RF and output through the RF port, powering the Redstone Furnace from Thermal Expansion, in this case.
Using Two Energy Nodes
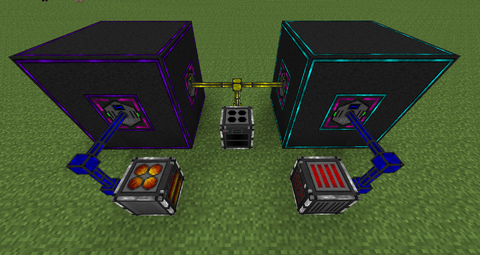
More than one Energy Node may be used to perform the conversion. In this example, we have linked two Energy Nodes together using two HEX ports, set to Interface mode. In this mode, all Energy Node Ports on a node become exposed to the rest of the HEX Energy Network and can be used elsewhere. Here, we are using two nodes and two ports like that (yellow Hexorium Cable in this example). Because of this, it is possible to link any port from the right node with any port of the left node. Everything else in this example is same to the previous one. We are still converting HEX to RF, but we are using two nodes for it instead. This is useful if you want to output your energy on a location other than where the actual generator is. Keep in mind that if you are linking two nodes like this, you will have to calculate both Energy Node Core losses. This means that if one core is tier 1 (40% loss), and other tier 3 (10% loss), the net loss will be 25%.
Transfer Instead Of Conversion
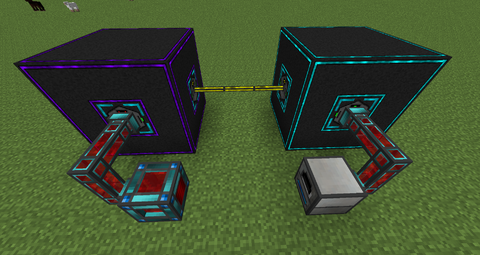
The Energy Nodes don't necessarily have to convert energy. They can also pass energy from one point to another. Provided that both linked ports are of the same energy type, one set to Input, other to Output, all energy will simply be passed from one port to the other. In this situation, the energy loss still has to be counted in. If you wish to have lossless transport, please use the highest tier. In addition, the transfer rate will always be limited to the lowest of two tiers. In this example, we are simply passing RF energy from a Resonant Energy Cell to a Redstone Furnace, both being Thermal Expansion machines.
Using Tunnel Mode
As mentioned earlier, Energy Node Port HEX can have a fourth mode: Tunnel. This mode allows us to transport HEX energy from one place to another, completely lossless and with all energy drains on one side having direct connection to energy sources on another. The perk of this system is that you don't have to limit yourself to tiers (it works identically on all tiers) and that you can isolate a network from another network. To demonstrate, in this example, we are using a similar setup from before, but with two HEX ports instead of RF ports. Both of these ports are set to Tunnel mode. As such, all machines on the blue Hexorium Cable will see each other as if they are on same network. This wouldn't be the case with a normal Input and Output ports, as all drains would only be able to see one source: the port itself. In addition, tunnelling like this isolates a network from another network. If the networks weren't isolated, the Hexorium Generator in the middle would be working, but it is not.
Long Distance Conversion
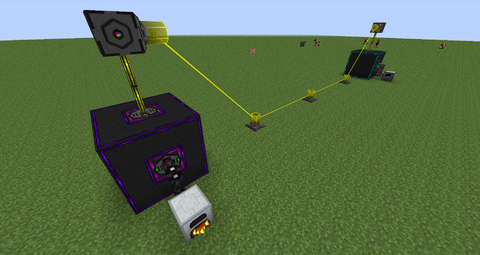 Using Energy Pylons to link long distance nodes. |
Because the HEX ports set to Interface mode don't really care how they are connected, you can separate Energy Nodes by large distances, provided they are still connected in some way. In this example, we have separated the two nodes, but kept them linked using the Energy Pylons. We are also converting EU energy to RF energy, and it works completely fine.
Complex Example
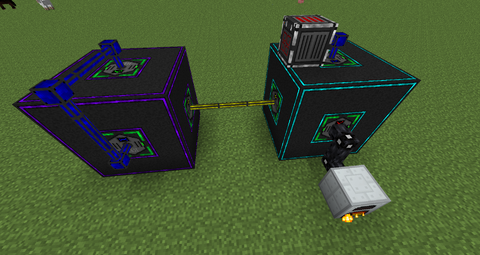
This last example combines most of the things shown in these examples and is a use case that will probably never happen in reality. EU energy is input on the side of the right node, then it is transferred to the left node and output on the top as HEX energy. This HEX energy is then channelled through a blue Hexorium Cable to a HEX port on side set to Tunnel mode and then exported through a HEX port on top of right node into a Hexorium Furnace. In reality, a situation like this will probably not happen because it is incredibly redundant, but it was shown here just to demonstrate the possibilities.
Destroying The Structure
The Energy Node can be easily broken by destroying any of its blocks. An unformed node will lose all of its links and all internal buffers of ports will be emptied, so please keep that in mind.
Lore
Energy Node is the pinnacle of Hexorium engineering. The node no longer deals with standard HEX energy. Instead, the node converts all incoming energy into a special internal energy type, which is then routed around as needed. The Energy Node uses different ports and their internal converters to switch between energies, with Energy Node Port HEX being the most complex one. In addition to conversion, the Energy Node needs no power for itself, as it gets all the power it needs from its Energy Node Core. The core houses all important electronics for communication and information exchange. Depending on the processing power and energy storage of the core itself, the Energy Node will work with different performances.
